The DIY Guide to Installing Solar Panels at Home
As energy prices continue to rise, more homeowners are looking for alternative sources of energy. Solar power has emerged as one of the most popular solutions, not just for its environmental benefits but also for long-term savings on energy bills. Installing solar panels at home can seem daunting, but with the right guidance, you can undertake this project as a DIY endeavor. This comprehensive guide will walk you through the steps necessary to successfully install solar panels at your own home.
Understanding Solar Panels
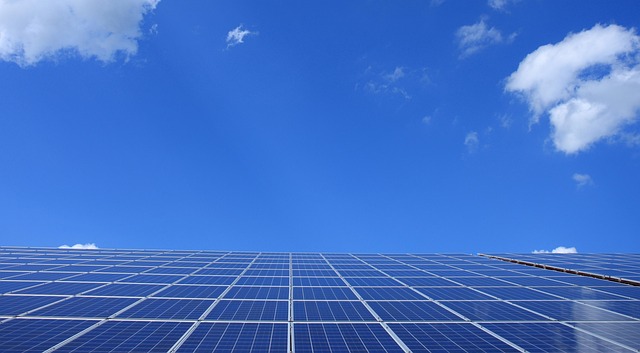
Before diving into the installation process, it’s essential to understand how solar panels work. Solar panels convert sunlight into electricity using photovoltaic (PV) cells. These cells are typically made of silicon and utilize the photovoltaic effect to generate direct current (DC) electricity, which is then converted to alternating current (AC) by an inverter, making it usable in your home. There are several types of solar panels to consider, including monocrystalline, polycrystalline, and thin-film panels, each with its pros and cons.
Benefits of Installing Solar Panels
There are numerous benefits to installing solar panels at home:
- Cost Savings: By generating your electricity, you can significantly reduce or even eliminate your energy bills over time.
- Increase in Property Value: Homes with solar panels often see an increase in property value, making them more attractive to potential buyers.
- Environmental Impact: Solar power is a renewable resource, helping to reduce your carbon footprint and reliance on fossil fuels.
- Energy Independence: Generating your power allows for greater energy independence and less vulnerability to utility price increases.
Assessing Your Home’s Solar Potential
Before you start planning your solar panel installation, it’s crucial to evaluate your home’s solar potential:
First, consider the location and orientation of your roof. Solar panels work best on south-facing slopes at an angle, allowing them to capture the most sunlight. Check for shading from trees, buildings, or other structures. If your roof is overshadowed for much of the day, you might want to consider a ground-mounted solar system instead.
Next, analyze your current energy consumption by reviewing past utility bills. This will help you determine how many solar panels you’ll need to install to meet your energy needs. Aim for a solar system that can produce at least 100% of your energy consumption to maximize your savings.
Choosing the Right Solar Panels
When it comes to selecting solar panels, options vary significantly in efficiency, price, and warranty. Monocrystalline panels are generally the most efficient option, ideal for smaller roofs with limited space. Polycrystalline panels are slightly less efficient but can provide a cost-effective solution for larger surfaces. Thin-film panels are the least efficient yet the lightest option, making them suitable for unconventional roofing materials or areas with weight restrictions.
Consider factors like the solar panel’s efficiency rating, temperature coefficient, warranty length, and price per watt to ensure you choose the best panels for your installation.
Gathering Required Tools and Materials
Before you begin the installation process, it’s crucial to gather all necessary materials and tools:
- Solar panels
- Inverter
- Mounting hardware
- Roofing brackets
- Electrical wiring and connectors
- Tools: drill, socket set, ladder, voltage tester, level, and safety equipment
Obtaining Necessary Permits and Regulations
Before installation, check with your local government for any permits or regulations regarding solar panel installations. Different areas may have specific requirements for electrical work, zoning, and building codes. Familiarizing yourself with these regulations will save you from potential legal issues down the line.
Preparing for Installation
Once you have your permits in place and have gathered your materials, it’s time to prepare your installation area. Ensure your roof is structurally sound and ready for panels. If necessary, perform any roof repairs before proceeding. Clear debris and ensure the installation area is clean and accessible.
Installing the Solar Panels
Now it’s time for the installation process:
Mounting the Solar Panels
Begin by installing the mounting brackets on your roof as per the manufacturer’s instructions. Ensure they are correctly aligned and securely fastened to the rafters or trusses for durability. The panels should be mounted flush against the brackets, allowing them to face the sun directly.
Wiring the Solar Panels
After securing the brackets, place the solar panels onto them. Connect the solar panels in accordance with the manufacturer’s guidelines, typically in either series or parallel configurations. You will need to connect the positive and negative terminals accordingly. Always use high-quality wiring and connectors to ensure safe and efficient energy transfer.
Installing the Inverter
Once the solar panels are in place, install the inverter in a shaded location such as a garage or basement. The inverter should be mounted on the wall and as close to the solar panels as possible to minimize energy loss. After securing it, connect the inverter to your solar panel array following the manufacturer’s wiring instructions.
Connecting to Your Electrical System
The next step involves connecting your inverter to your home’s electrical panel. This stage requires careful attention and should be approached with caution. Disconnect the main power supply to ensure safety during the process. Using appropriate connectors and wiring, link the inverter output to the electrical panel’s designated breaker. Double-check all connections to ensure they are secure.
Performing Final Checks
Once the system is connected, go through a thorough checklist to ensure everything is correctly installed:
- Confirm all readings are correct on the inverter display.
- Ensure that all connections are secure and properly insulated.
- Check for any shading or obstructions that may impact the panel’s performance.
- Monitor the inverter’s performance for the first few days and ensure it’s generating the expected amount of energy.
Monitoring and Maintenance
After the installation, it’s essential to monitor your solar system to ensure it operates efficiently. Many modern inverters offer monitoring features, allowing you to track energy production via a smartphone app. Regular maintenance is minimal, typically involving occasional cleaning and inspections to check for damage and ensure optimal performance.
Conclusion
Installing solar panels at home is an attainable project for many homeowners. By assessing your solar potential, carefully selecting panels, gathering the necessary materials, and following proper installation procedures, you can take a significant step toward energy independence. Though the process may seem overwhelming, the long-term savings and environmental benefits make it a worthy investment for the future.
Embarking on your solar journey not only empowers you to control your energy costs but also contributes to a sustainable future. With careful planning and execution, you can enjoy the advantages of renewable energy right from your roof.